How to change from Quick Access to This PC
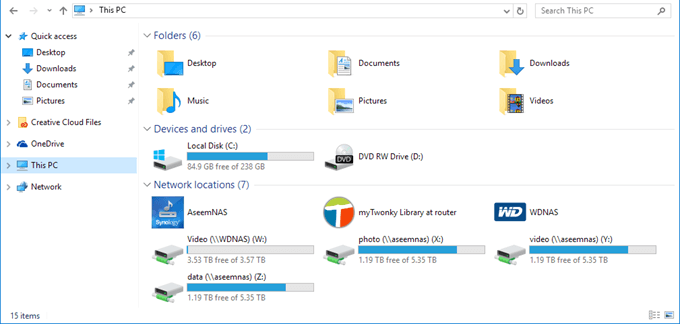
After upgrading to Windows 10 recently, I noticed that whenever I opened Explorer, it would always show me Quick Access. I like the new Quick Access feature, but I preferred to have Explorer open to This PC instead.
For me, being able to access the different drives on the computer and my network devices was far more important than accessing frequently used folders or recently opened files. It’s a useful feature, but I don’t mind having to click once to access it.
Table of Contents
In this post, I’ll show you how to change the default folder from Quick Access to This PC when opening Explorer. In addition, I’ll also show you a trick whereby you can set any folder to be the default folder when opening Explorer in Windows 10.
Set Default Folder to This PC
To change the setting, open Explorer, click on File and then click on Change folder and search options.

In the dialog that pops up, you should already be on the General tab. At the very top, you’ll see Open File Explorer to where you can select from This PC and Quick Access.

Just pick whichever folder you prefer and you’re good to go! Now when you open Explorer, you should see it open to This PC selected instead of Quick Access.
If you need to do this on many machines in a corporate environment, you’ll be happy to know that there is a registry entry that controls this setting also. Just navigate to the following key:
HKEY_CURRENT_USER\SOFTWARE\Microsoft\Windows\CurrentVersion\Explorer\Advanced
On the right hand side, look for a DWORD key named Launch To. 1 means This PC and 2 means Quick Access.

Finally, let’s talk about how we can configure Explorer to open up to any folder as the default folder.
Set Any Folder as Default for Explorer
Since there really isn’t any official way to do this, we have to kind of hack Windows to get it to do what we want. I’ve tested it out and the process seems to work just fine. To get started, find your folder and create a shortcut to the folder on your desktop.

For example, if I wanted to use the Pictures folder as my default folder, I would right-click on it, choose Send to and then click on Desktop (create shortcut). Next, we need to copy that shortcut into a special location in Windows. First, let’s open Explorer and go to that special location. Just copy and paste the following path into the address bar in another Explorer window:
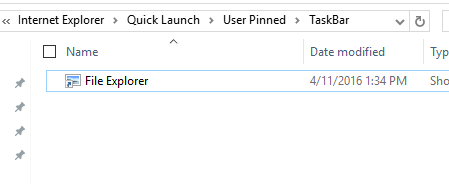
%APPDATA%\Microsoft\Internet Explorer\Quick Launch\User Pinned\TaskBar
Make sure to press Enter after you paste the path into Explorer. Depending on what else is pinned to your taskbar, you might see shortcuts to several programs here, but you should always see a File Explorer shortcut.

Now go ahead and drag the shortcut that we just created from your desktop into the special folder you have open in Explorer. Now we have to do one last thing. Go ahead and delete the File Explorer shortcut and rename the Pictures Shortcut to File Explorer. If you chose a different folder than Pictures, then change whatever the name of that shortcut is to File Explorer.
That’s about it! Now open File explorer from your taskbar and you should be viewing the contents of whichever folder you chose to be the default folder.

It’s worth noting that this little trick will only work when you click on the Explorer icon on your taskbar. If you open Explorer by double-clicking on This PC on the desktop or by clicking on Start and then File Explorer, you’ll either see This PC or Quick Access, depending on which option is chosen in the settings.
If you want to undo what we just did above, all you have to do is right-click on Explorer in the taskbar and choose Unpin from taskbar. After that, just drag the This PC icon from your desktop and drop it onto the taskbar again. This will create a new Explorer shortcut and it’ll work normally.
Pin Folders to Quick Access
If you don’t like any of the two options above, you do have one other choice in Windows 10. You could use the new pinned folders feature that is associated with Quick Access. When you open Explorer, you’ll see a pin icon next to several folders under Quick Access.

The Desktop, Downloads, Documents, Pictures, This PC and Music folders are pinned by default in Windows 10. If you want to remove any of them, just right-click and choose Unpin from Quick Access.
However, if you want one click access to any folder on your computer, navigate to that folder, then right-click on Quick Access and choose Pin current folder to Quick Access.

As you can see, this is how I pinned the Program Files folder to my Quick Access section. Using this method, you don’t have to resort to any hacks and you can also quickly access any folder on your system with two clicks.
Lastly, you can also get to that pinned folder quickly by simply right-clicking on the File Explorer icon in your taskbar and choosing your pinned folder, which will show up in the jumplist.

So in summary, if you want to change the default folder system-wide, you can only pick between This PC and Quick Access. If you use the second method involving the shortcut hack, then you have to use the shortcut from the taskbar.
Lastly, if you just need quick access to a folder, try using the pin to Quick Access option as that will also be system-wide and will remain in the left-hand side even as you browse through other folders. If you have any questions, post a comment. Enjoy!
Subscribe on YouTube!
Did you enjoy this tip? If so, check out our very own YouTube channel where we cover Windows, Mac, software, and apps, and have a bunch of troubleshooting tips and how-to videos. Click the button below to subscribe!
Subscribe


